Simple Sequence.
This sub tutorial shows how to create the sequences and it is very essential to under stand.
A sequence contains one or more scenes.
This could be color alone as in this tutorial or it could be a mix of more controls.
In some situations it is wanted to have all light setting in one at the time and shift between the sequences / Scenes.
This could be a theater where all light are set in one well defined order and then for each scene in the show a light scene is created.
The playback is then just to activate the Light scenes one by one so they match drama scenes.
An other situation could be a band or a discotheque where the control is split so some sequences only control the color setting, some light position and some the shutter.
This makes it possible with one set of sequences to set the colors and with others to position.
How to make a Sequence with just one scene.
In the figure bellow all 4 KAM bars has different colors as an start.
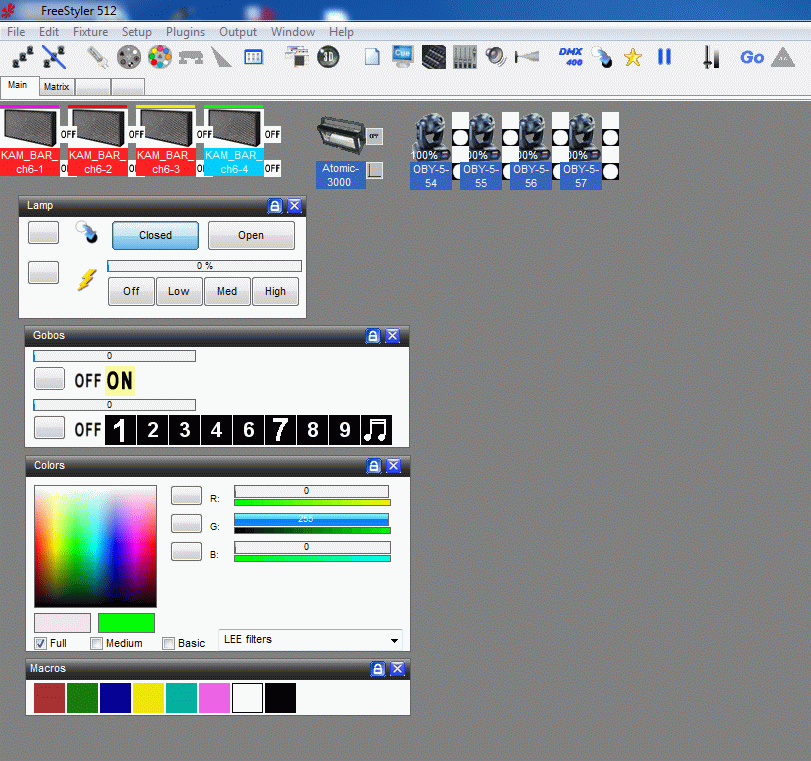
Open “Sequence editor”.
Select all 4 KAM bars and press the red Macro Icon.
Now the first scene is recorded
Don’t press the “+” icon in the sequence editor it will add a new scene and here an extra scene.
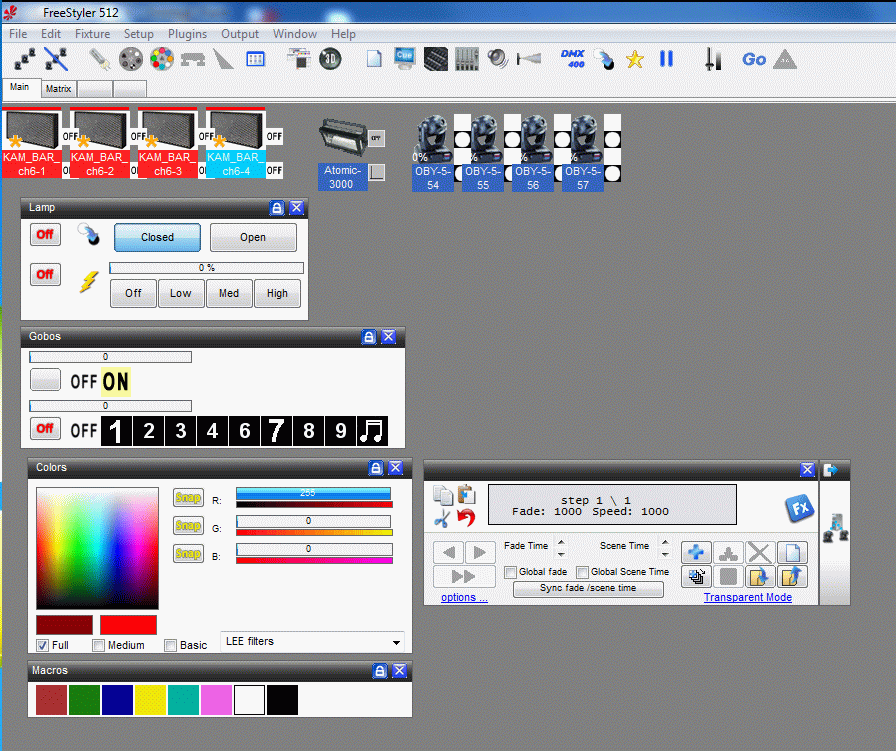
Now save the sequence. Here the name “All_Red” is used and it is saved in a path named “\wiki\KamBar\” It is a god idea to keep related sequences together in sub folders so they are easy to find and identify.
Note that the 3 color faders in the color panel has shifted to “Snap”.
This is the 3 faders that are recorded for the 4 selected fixture.
It is important when CMY or RGB controlled fixtures are used to set all 3 faders to “Snap” or “Fade”.
If they are not all selected then an old scene may have full green and if the new scene then only adjust the red fader then the resulting color will be yellow and not red as wanted. See evt.Led Submaster Tutorial
The selection of “Snap” or “Fade” is here “Snap” because a instant shift are wanted.
In a more advanced way to do Snap / Fade issue could be to make the sequence as fade and then in the play back of the sequence, disable all fades. See Play back Option – Disable all Fades
The shutter is not opened in this example and it doesn’t matter because the shutter channel is not recorded in this scene. If the shutter are to be used then it will be done in separate sequences. Also it is not necessary to have the shutter open for programming the colors because the color can be can be seen above the fixture icons.
Repeat the recording of color scenes.
New sequence is opened by pressing the blank page icon.
Press the wanted color in the macro icon.
Check that all 3 RGB faders are set to “Snap”
And save the Sequence.
In this tutorial more 1 scene color sequences made are.
All_Blue, All_Cyan, All_Green, All_Mangenta, All_Red, All_White and All_Yellow.
Also a All_BlackOut is made as an alternative way to switch off the KAM Bar’s.
Sequences with more scenes.
In this example a Red-Blue shift is made.
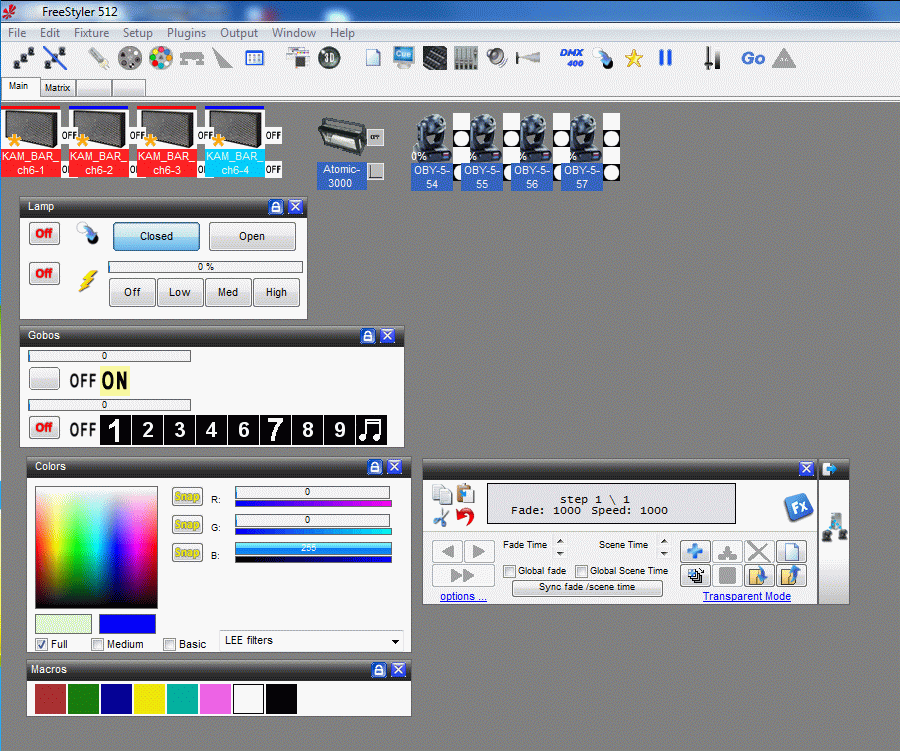
Like above, Open Sequence editor.
Select all Kam Bar’s change the color to Red.
Note that all 3 RGB faders are set to “Snap”
De-select fixture 1 and 3
Set the color for fixture 2 and 4 to blue.
Now Scene one is set.
Add the next blank scene by pressing the “+” icon.
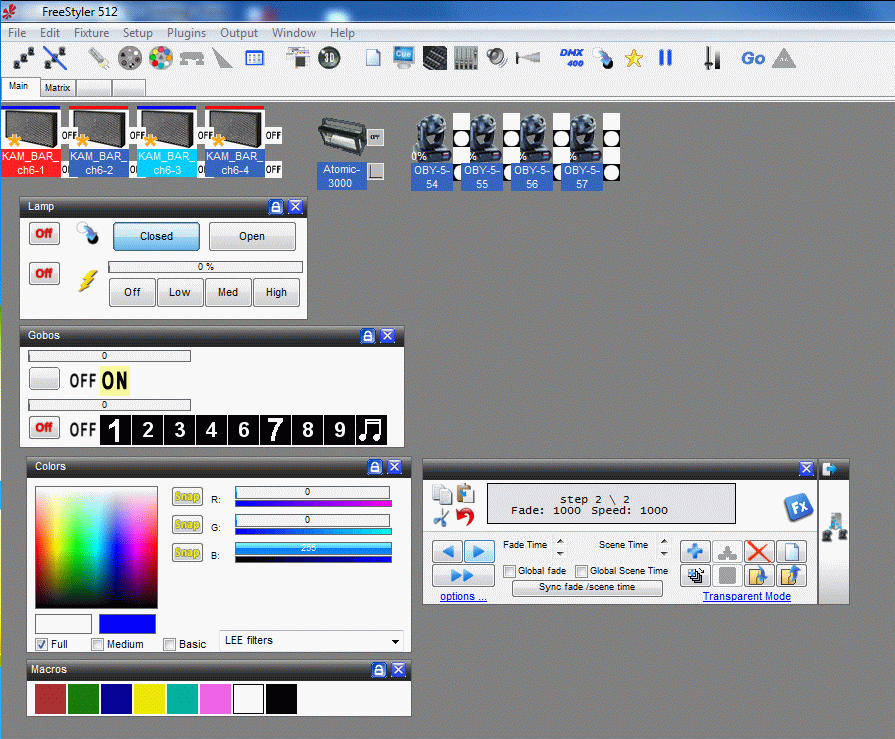
Repeat the process from above just with fixture 2 and 4 set to red and 1 and 3 set to blue.
Save the sequence as “Red_Blue_Shift” in the path “\wiki\KamBar\”
Note that all changes made will be recorded. If by accident the oby-5 is selected and the gobo is change then this will also be recorded unless the fader are set to off after the changes.
It doesn’t matter if the fixture are selected or not selected in the moment of saving.
All changes are recorded.
Additional scenes made are:
A Color_Shift_01 that shifts like the red blue shift but with more colors.
A Red_Green_Blue that shift all fixture in the 3 colors.
And a RGB_7_Color that shift in the 7 colors that are present as macros.
Building a Cue.
Open the Cue Panel.
If the cue isn’t empty then clear it. Cogwheel → “Clear List”
Then also under the Cogwheel _ “Insert Sequences” and navigate to “Wiki\KamBar”.
Insert the sequences one by one.
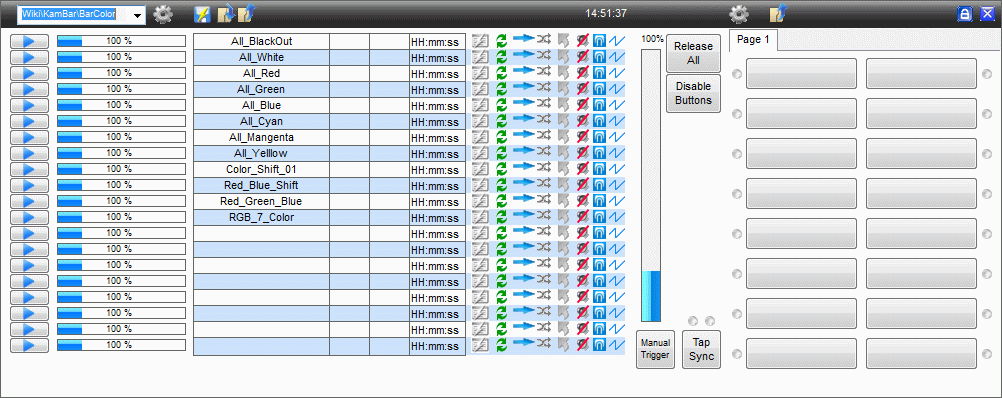
Save the cue as BarColor under “\Wiki\KamBar”.
Adding the Cue to Sub Master.
Open the “Sub Master panel”
On Tab 6/10 colon 2 place the BarColor cue by pressing the open folder icon and navigating to “Wiki\KamBar\”. Then drag the BarColoc.fcf file into the wanted colon.
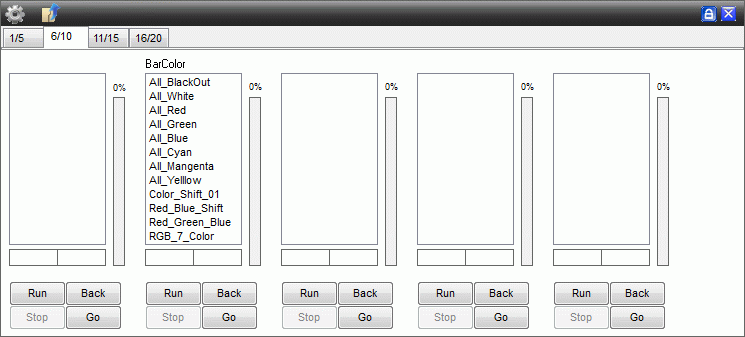
Place Sequence on Override Buttons.
Open the “Override Button panel”
Press the Cogwheel and insert scenes.
Place All_Blackout, All_Red, All_Green, All_Blue and All_White to the buttons.
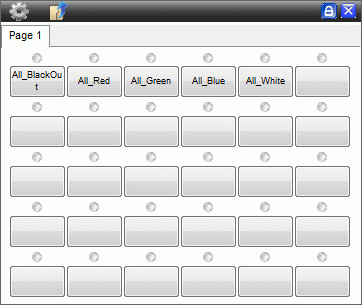
Note in the Cogwheel menu the are a point “Highest Priority”.
By checking this “on” the override buttons get higher priority than the manual override.
This is something depending on the user. For playing with this function it is chacked on.
Ready to Play
Open Sub master again.
Clear eventually the cue list in the cue panel.
Open 3D easy view.
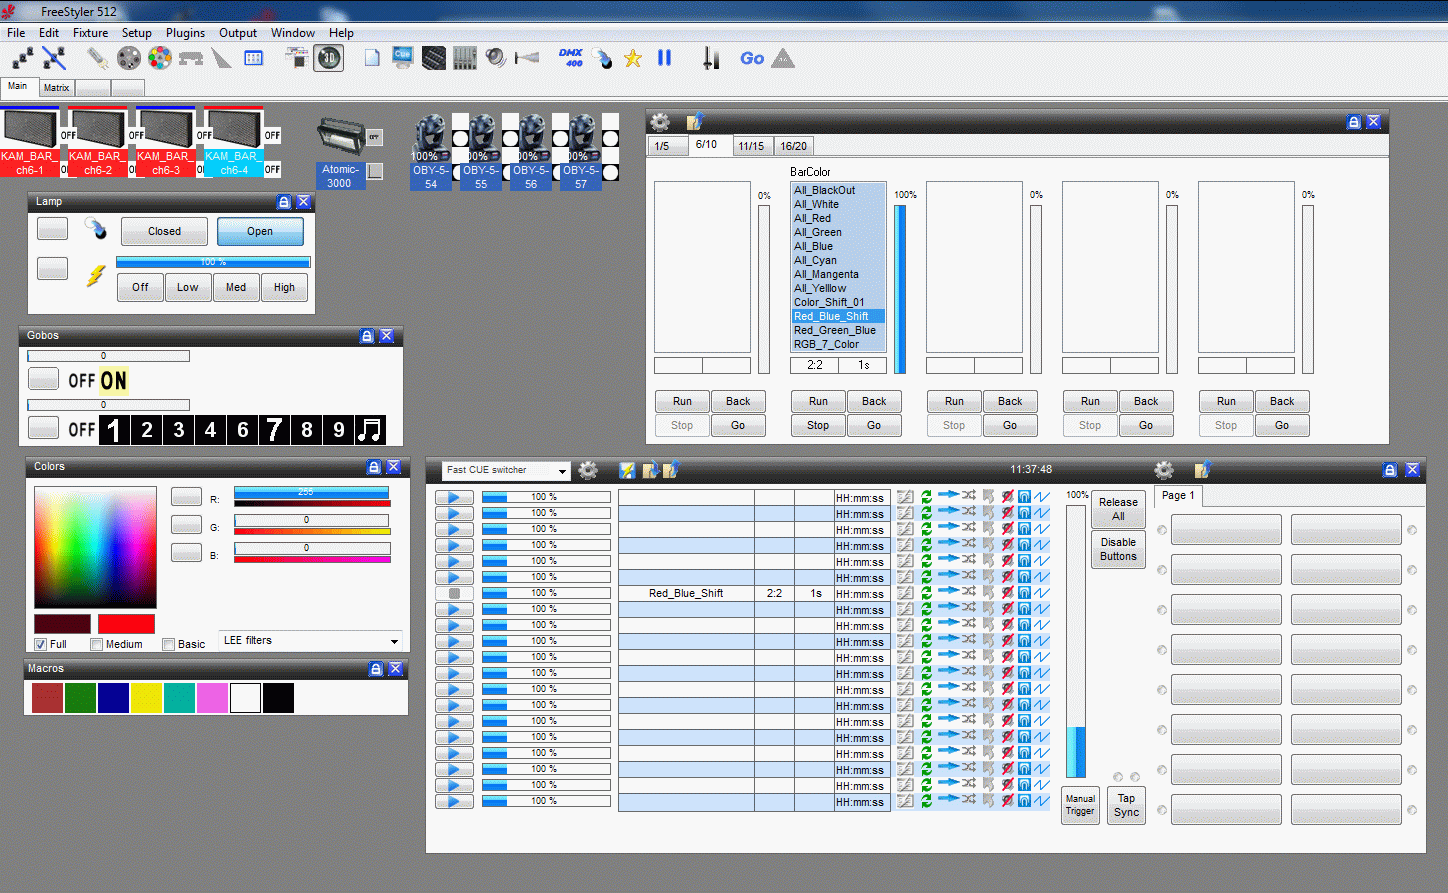
Select all 4 KAM Bar fixtures and open the shutter.
In Sub Master menu select a sequence like Red_Blue_Shift. “Double click” and remember to adjust the fader next to the colon to 100 % .
And now there should be a some red blue shifting light.
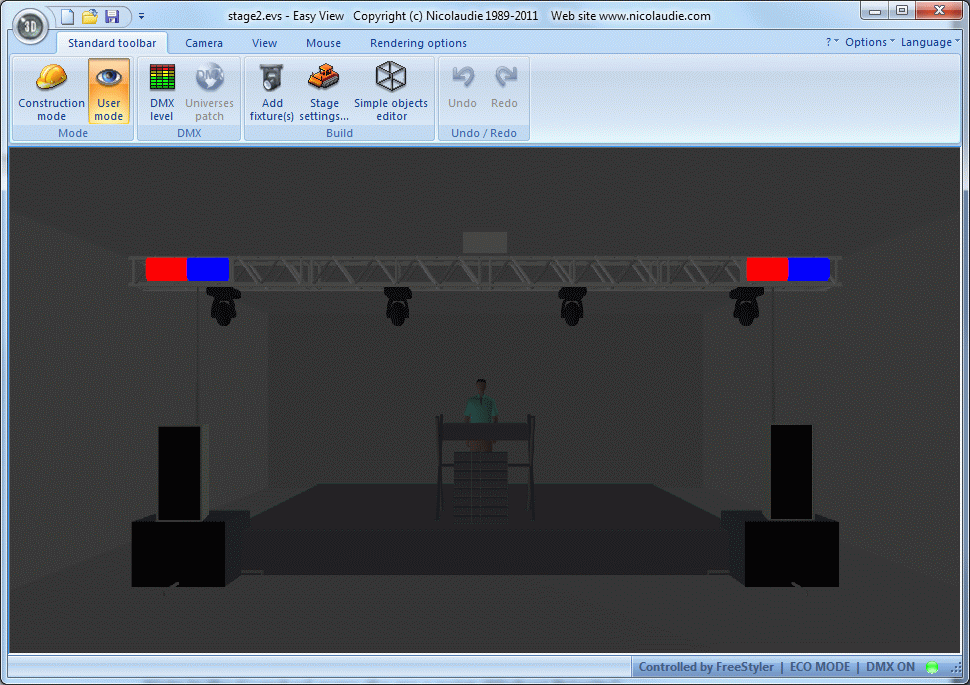
Open eventually the override button panel and press some of the buttons to see that they shift the light.
The Files created in this tutorial.
The sequences and the cue created in this tutorial are packed in this zip file with path.
They are to be unpacked so the files are place as described in the tutorial.
freestyler_kam_bar.zip
When they are placed correct then the cue file are manually to be added to Sub master 7 as described above.
