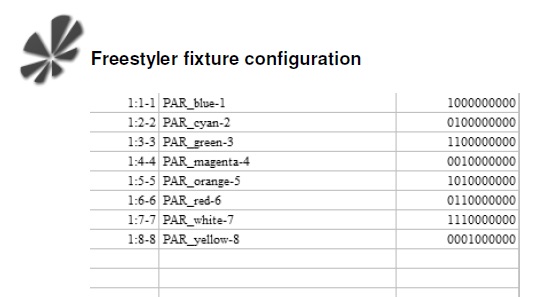
Table of Contents
Adding and Removing Fixtures in FreeStyler
Adding and removing fixtures in FreeStyler is quite simple, but a few guidelines would not go amiss. Also known as patching.
If you have not done so already then install FreeStyler and when done start FreeStyler.
Note:
The examples below are based on different versions of FreeStyler and actually shows that this program is alive.
This also means that there are minor deviation in the figures shown and the latest version.
The deviation are not that significant and therefore has this part not been updated.
Adding fixtures
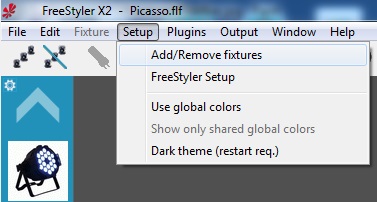
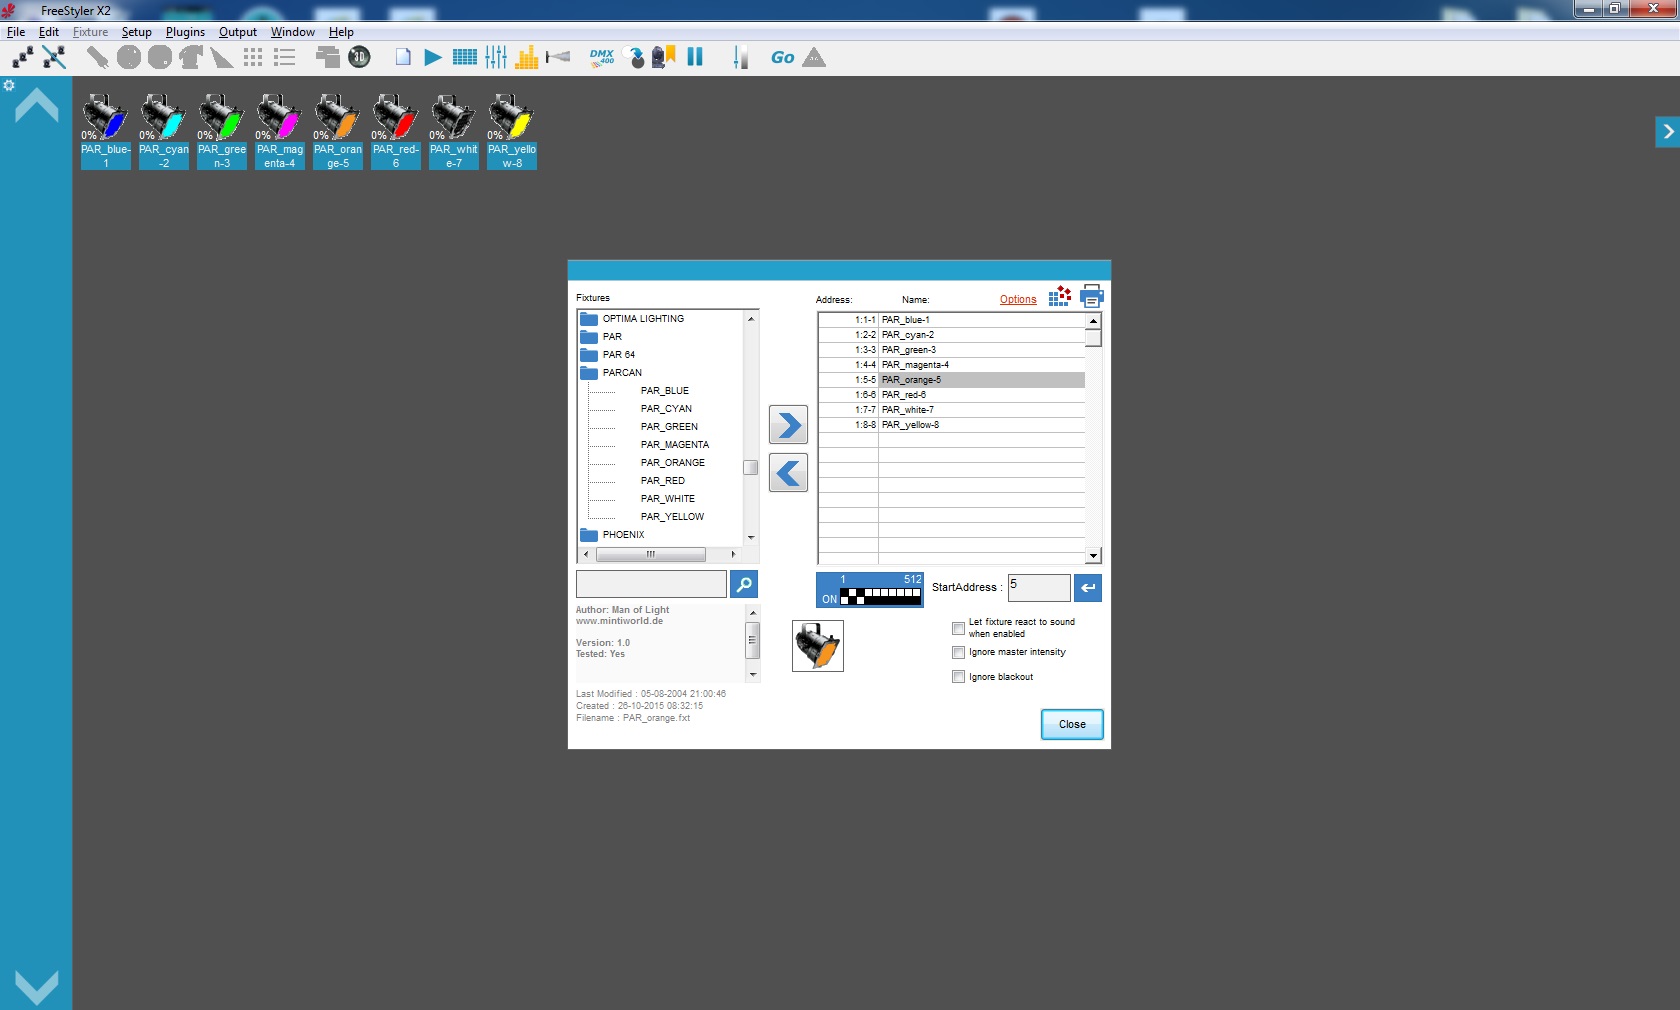
When FreeStyler has been started you will see a menu/toolbar at the top left of the screen like the one below.
Click “Setup” in the menu and then click “Add/Remove fixtures”.
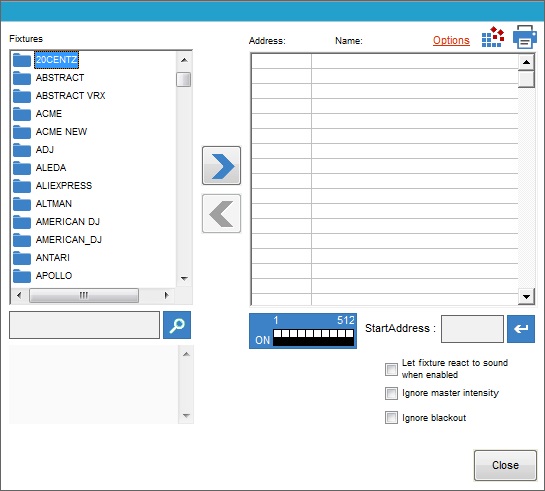
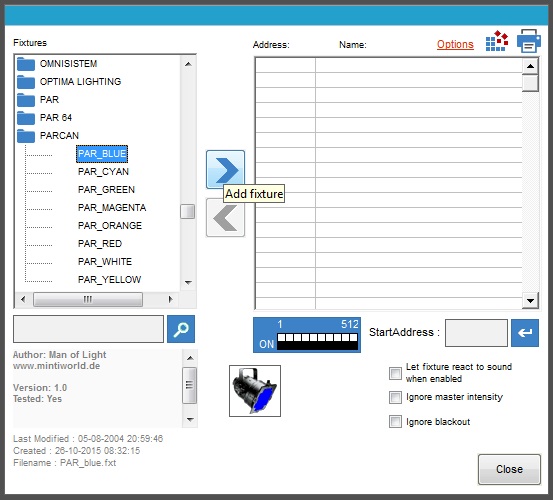
You should now see the following dialogue box in the centre of you screen.
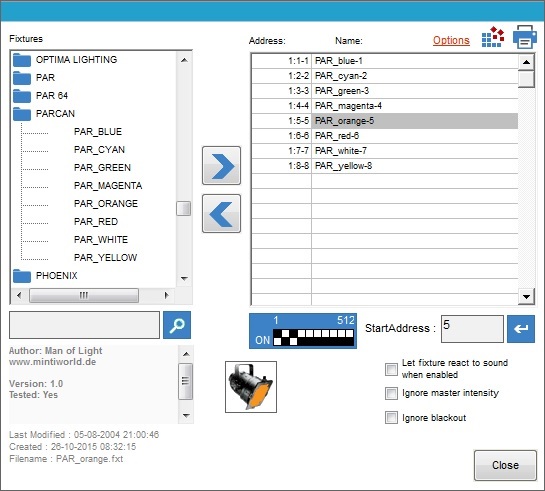
On the left of this dialogue box is a list of lighting manufactures of existing lighting fixtures.
\\Click the folder to expand or collapse the list of fixtures contained within.
Below this will be the description and picture of the selected fixture.
On the right of this dialogue box is a list of fixtures already added (patched), including the address and name.
Below this is a dipswitch image which will show the dipswitch settings of a fixture selected from the list of your patched fixtures.
\\In this image a dispswitch is off if up and on if down. Use this to set the dipswitch of fixtures that require this type of addressing.
Next to the dipswitch is a control where you can manually change the address of an existing patched fixture if you need too.
Three controls below this allow you to set some features of how your patched fixtures will re-act with FreeStyler.
These parameters can be changed later direct on the fixture.
“Close” button will close this dialogue and return you to the main FreeStyler screen.
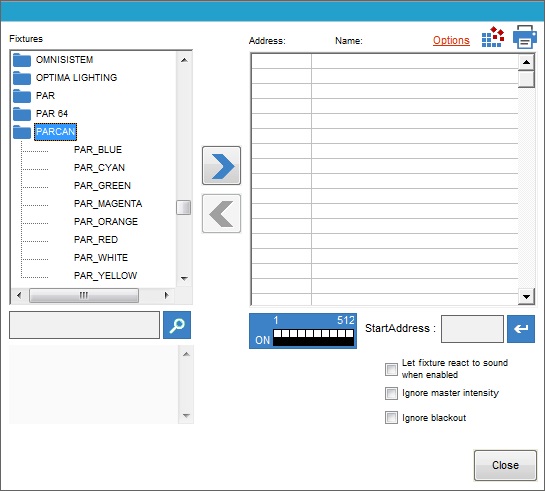
Scroll down the list of fixtures and find the “PARCAN” folder, click the folder to expand it.
Select the “PAR_BLUE” fixture by clicking it. Notice a picture and some information about the fixture appears below Now click the arrow that points to the right to add it to your list of fixtures.
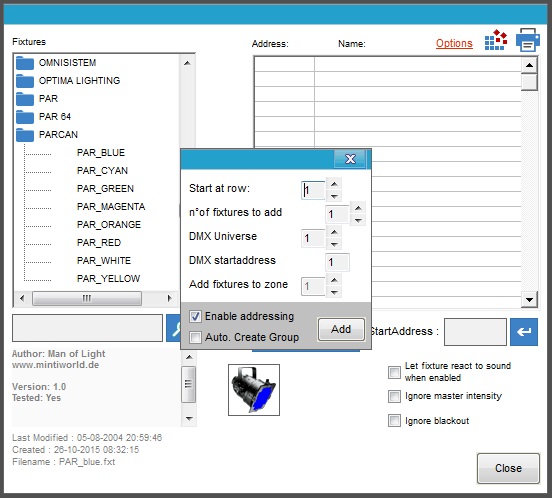
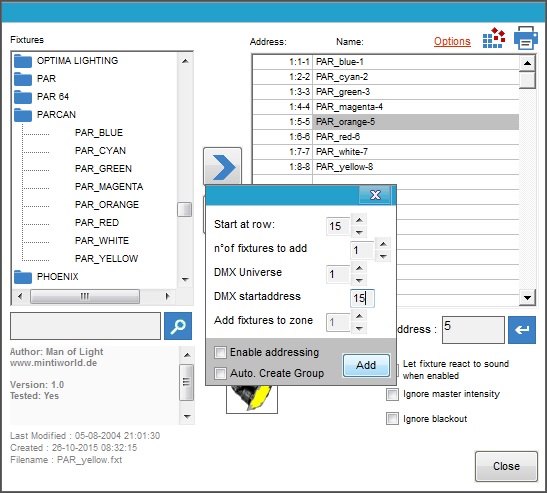
A little dialogue will pop-up which set the following.
“Row”: Row has nothing to do with DMX addressing it is just it's position in the list on the right.
“no. of fixtures to add”: Sets how many pieces of this fixture you want to add.
“DMX Universe”: There are 2 universes available each on 512 channels.
“DMX Start address”: This is the address where the fixture are to listen on. FreeStyler will automatic give the fixture the first free address but you can manually change this if needed. If you change it manually then you need to know what you are doing.
“Add fixture to zone”: Zone is 4 tabs in the main screen where it is possible to organize the fixtures so the main screen don’t get to crowded. See Zone
Additional there are 2 check (tick) boxes to enable auto-address and auto-create group.
For now just press the “Add” button to add the fixture to your list.
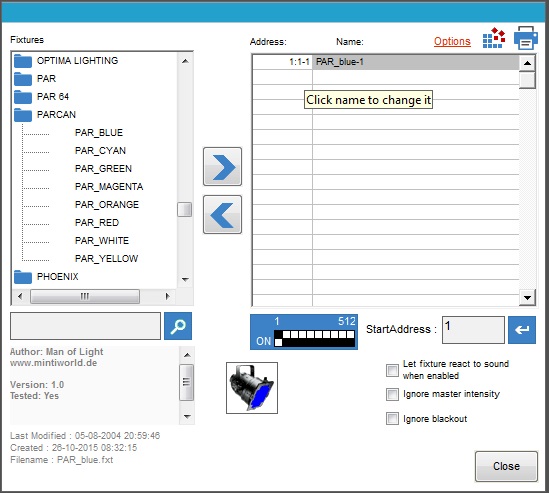
Now you can see the par can has been added to the list on the right. It shows it is using an address range of 1-1 which means one channel is used by this fixture. It has also been given a name of PAR_blue_1. If you wanted to change the name that has been created then just click in it as is shown by the balloon tip and then you can use the backspace key to erase the name and enter your own.
For now I want you to add 1 each of the rest of those PAR Cans, just do what you did above.
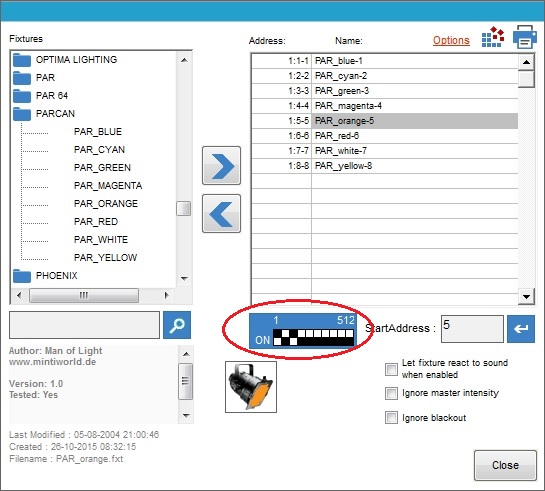
If you have done everything correctly then you should have 8 PAR Cans as shown in the above list.
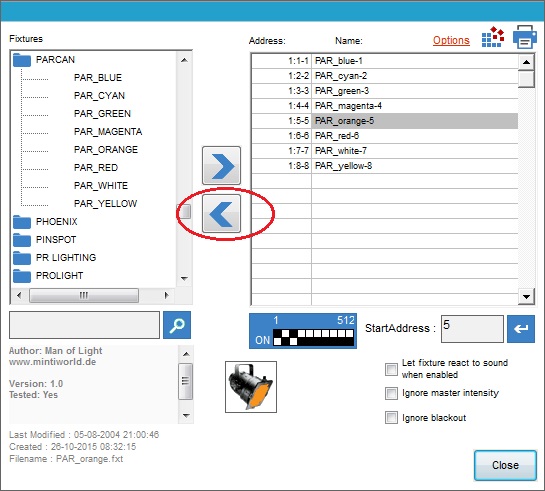
I have clicked on the PAR_orange_5 fixture to show you the dipswitch settings.
If your fixture has dipswitches to set the DMX Address this is very useful to you so you can see what dipswitches need to be on or off for your fixture. The dipswitch picture shows switches that are off in the up position and one that are on in the down position. As you can see this PAR Can is at address 5 and we have dipswitches 1 & 3 on which is binary for 5. For more information on dipswitches see the definition DMX How to set the addresses on the fixtures in The DMX Wiki.
Remember your fixtures dipswitches might be on in the up position and off in the down position. It depends on the fixture. Some dipswitches show the on position.
Looking back at the FreeStyler main screen you can see the 8 PAR Cans that have been added/patched. You might want to change the names so they are easier to read as you only get a short name on the screen for each fixture.
To rename a fixture just click on the name of the fixture you want to change in the list on the right and then press the backspace key to delete its current contents, now type in the new name for it and press enter. I am not going to show how to do that as I think the explanation is clear enough.
You can now close the “Add/Remove fixtures” dialogue.
Manual addressing of fixtures
FreeStyler not only allows automatic addressing of fixtures but also allows you to change the address of patched fixtures and patch fixtures without auto-addressing then assign an address to that fixture.
This can be used for various purpose and one that may pop-up from time to time is the combined fixtures where more fixtures are placed on the same address to get a full fixture control. See Fixture Creator - Combined Fixtures.
NOTE: When ”Enable addressing” is checked ”ON” FreeStyler does the addressing for you. If you give an occupied address in the ”DMX startaddress” then it will automatically be moved to the next free address.
And when ”Enable addressing” is checked ”OFF” the address in the fixture list will be empty and you are free to enter address.
As there is no check of what you are doing “Be careful”
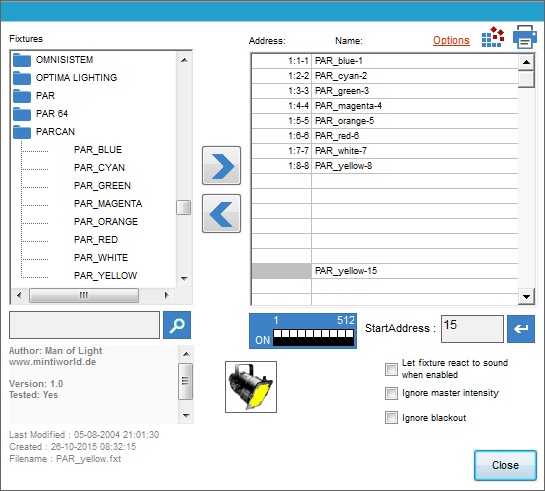
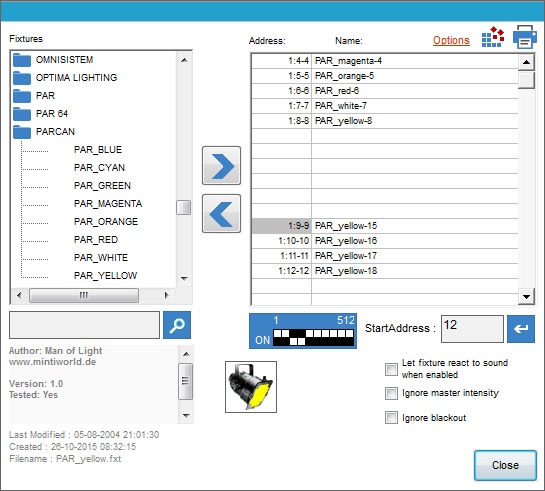
OK lets patch another PAR_yellow, ensure you have selected the PAR_yellow and the click the “add fixture button”. You should see the familiar dialogue as shown below.
As you can see I have changed the column to 15, the reason I have done this is to seperate it from the rest of the fixtures so it stand out easier in this tutorial. I also have changed the address to 15, this is actually not necessary as it is ignored if manually addressing a fixture ???? I have also un-ticked the “Enable addressing” tick box, well we are patching a fixture to an address we want rather than what FreeStyler wants to address it to.
Click the “Add” button.
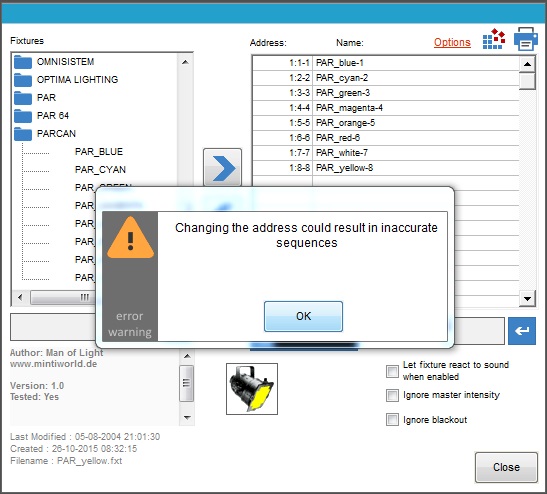
Now we have to actually set the address of the fixture, so click the fixture in the list on the right that you need to set the address for then click in the “StartAddress” input box and you get the prompt shown below.
Click the “OK” button.
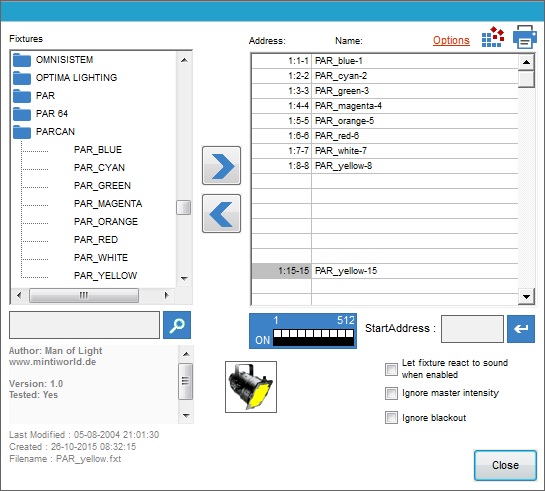
Now type in the address you want to set the fixture at in the “StartAddress” input box and press the “Return” button.
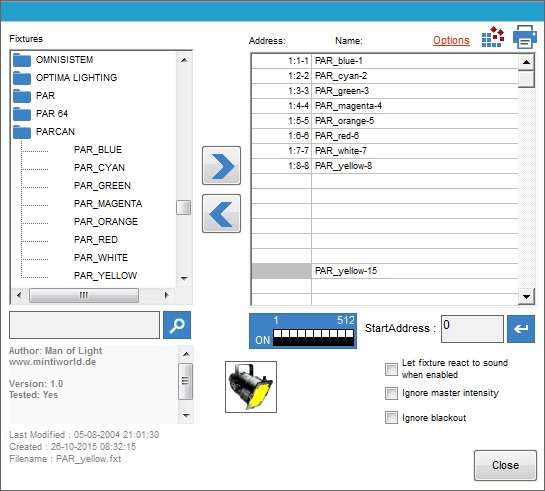
Now you can see the address has been set at 15 and it is in row 15, which I set in the dialogue.
That is how you manually address fixtures in FreeStyler.
Auto. Create Group
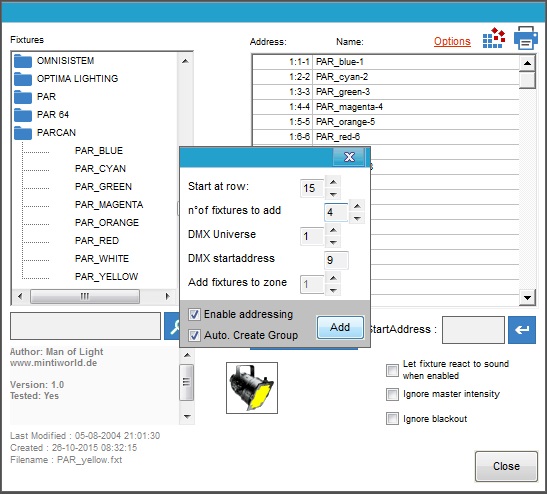
If you want to add more fixtures of the same type then “Auto Create Group” automatically becomes checked on and you will have the fixtures grouped.
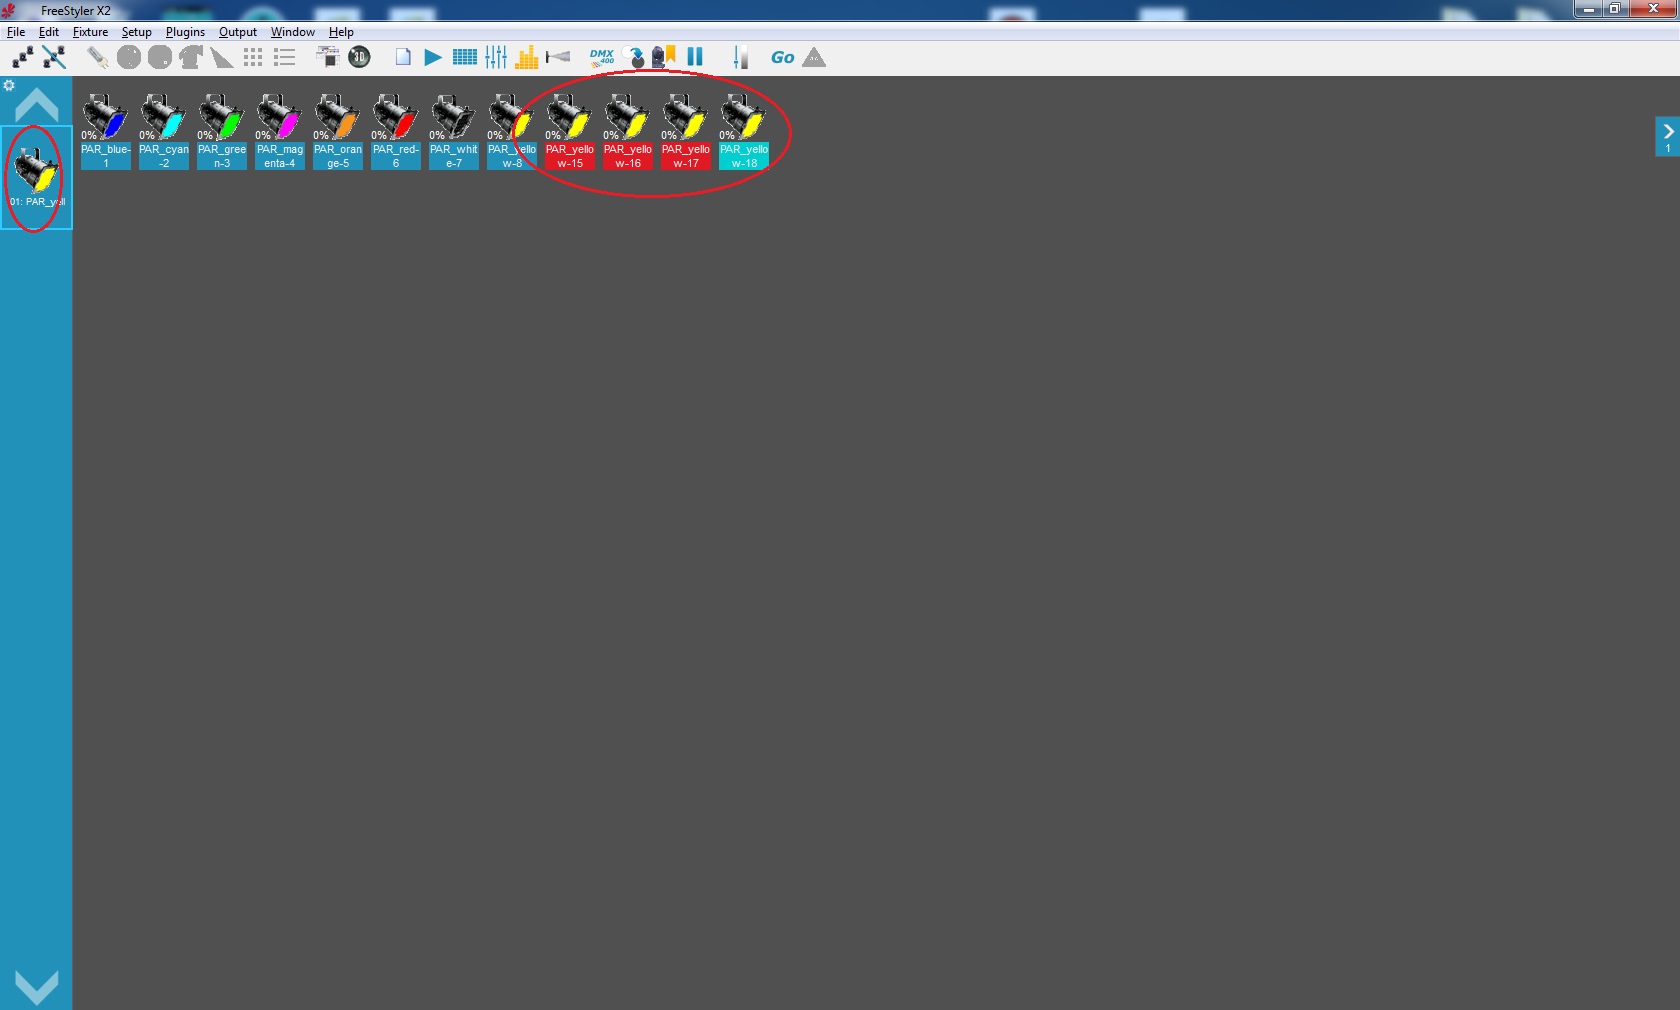
Here 4 x PAR_yellow is added.
In the main screen it will look like this.
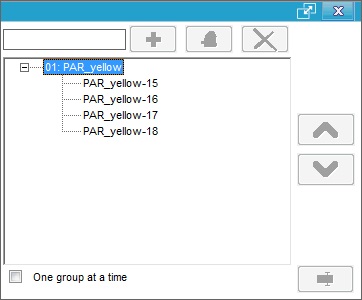
If you click the group parcan in left side of the image the 4 grouped parcans are selected. Note that the 1.st yellow parcan is not selected by the group as this one was added previously as a single fixture.
To edit the group go into “Edit” → “Groups”
Fixture Groups - Create Groups
Remove fixtures
To remove fixtures you would open the “Add/Remove fixtures” dialogue from the “Setup” menu then select the fixture that you want to remove in the list on the right and then press the blue arrow that points left to remove it from the list.
Before you removing a fixture it is a good idea to consider what will be affected by this removal. If the fixture never has been added / programmed into a sequence then just remove it.
But in the case where it has been programmed into a sequence then it will be a good idea to clean up the sequences.
This is to avoid a new fixture with another DMX table to be controlled by a sequence which is not programmed for it. It will mess-up your control.
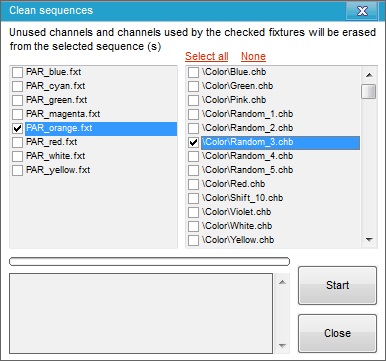
So the advise is clean-up the sequence before removing the fixture. Cleanup sequences.
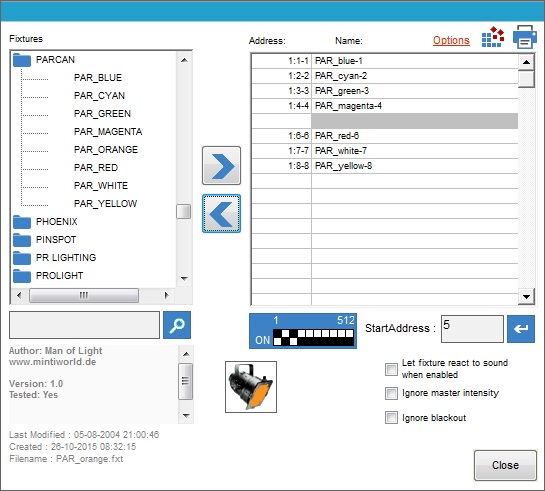
Click on the remove arrow and as you can see the fixture has been removed from the list on the right.
You can now close this dialogue.
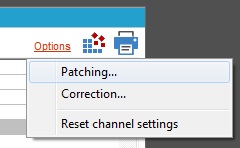
Options
Patching.
This is a shortcut to “Patching” in the “Setup menu” “Preferences”.
It is used to place the control function on more channels.
See Patch
Correction.
This is a shortcut to “Correction” in the “Setup menu” “Preferences”.
Here a fixed offset can be added to the value set by the control function.
See Correction
Reset channel settings
The following parameters are reset by this function:
- Channel inversed
- Favorite values
- Startup values
- Shutdown values
- Channel disabled
- Channel playback disabled
- Patching
- Low limits
- High limits
- Compensation values
- Release locked
Cleanup sequences.
![]()
This function is used to remove channels from sequences. It is channels where fixtures has been removed or channel related to the marked fixture that will be removed from the sequence.
