
TouchOSC is a tool which runs on both Android and Apple iOS. You can download the versions following the appropriate link below.
Google Play
Apple IOS
In addition to the apps on your mobile device you need a MIDI bridge and a layout editor. These can be downloaded from the download page on the website of the developer. Also detailed information on how to install can be found there.
Installation
1: Install the app on your mobile device.
2: Download the TouchOSC bridge for your OS and install it on your computer running FreeStyler.
3: Download the TouchOSC Layout Editor for your OS. There are both 64-bit and 32-bit versions available for Windows, so make sure you download the right one. Extract to a folder of your liking and open the program. When you open the program and get a Java error, please install a JRE from Java.com
Once all these steps have been completed it is time to startup the TouchOSC system. Find the TouchOSC Bridge program and start it. For your convenience you can let it start up automatically under windows by putting it in the startup folder in the startmenu. The bridge is lightweight and doesn't use a lot of resources.
Then we need to configure FreeStyler to allow MIDI input and output from TouchOSC. You can do this by opening FreeStyler. Go to Setup → FreeStyler Setup. In the setup screen click External Control → MIDI Control. You will see the following screen:
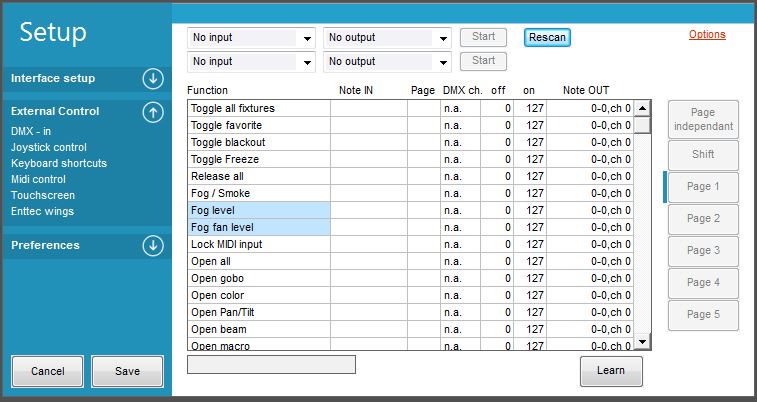
In the left hand top corner select TouchOSC Bridge (it will only be visible when the bridge is running). Then click start.
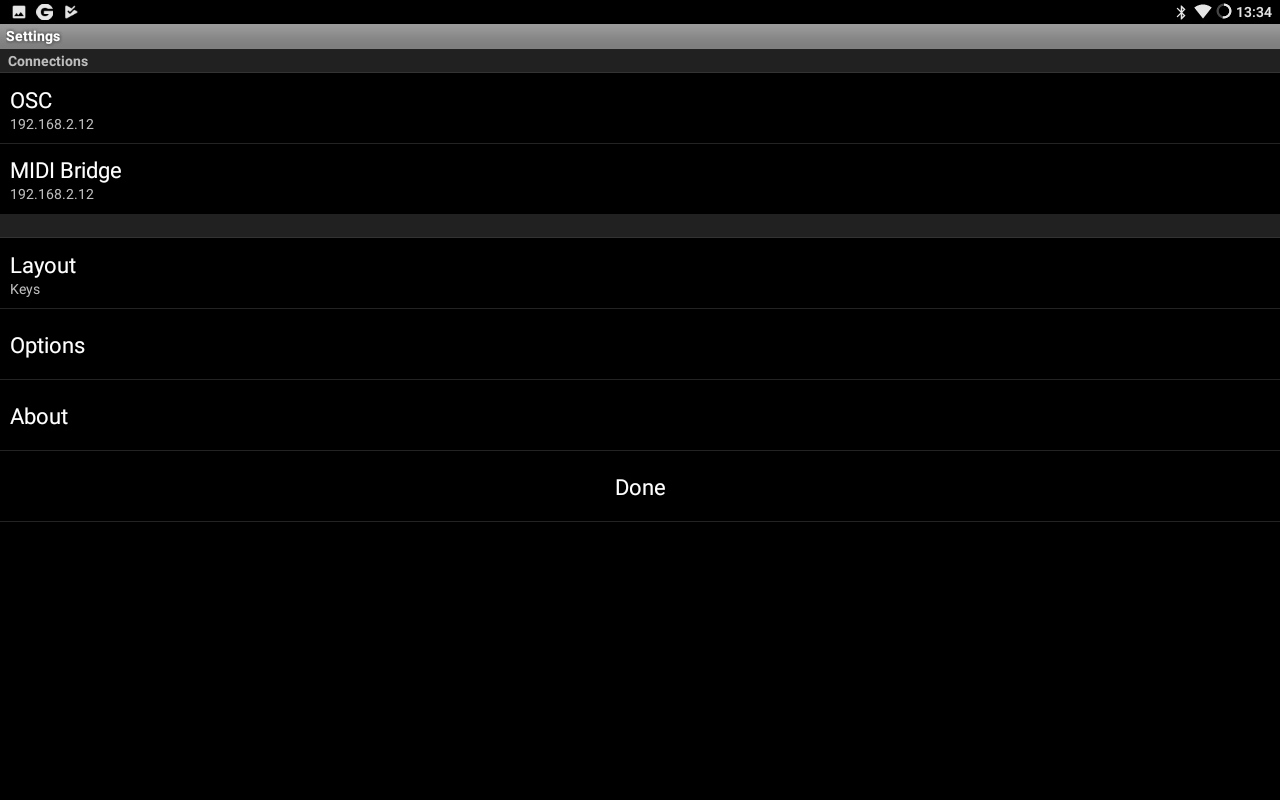
On your mobile device you can start up TouchOSC. The Settings screen will come up. For us the main option is MIDI Bridge.
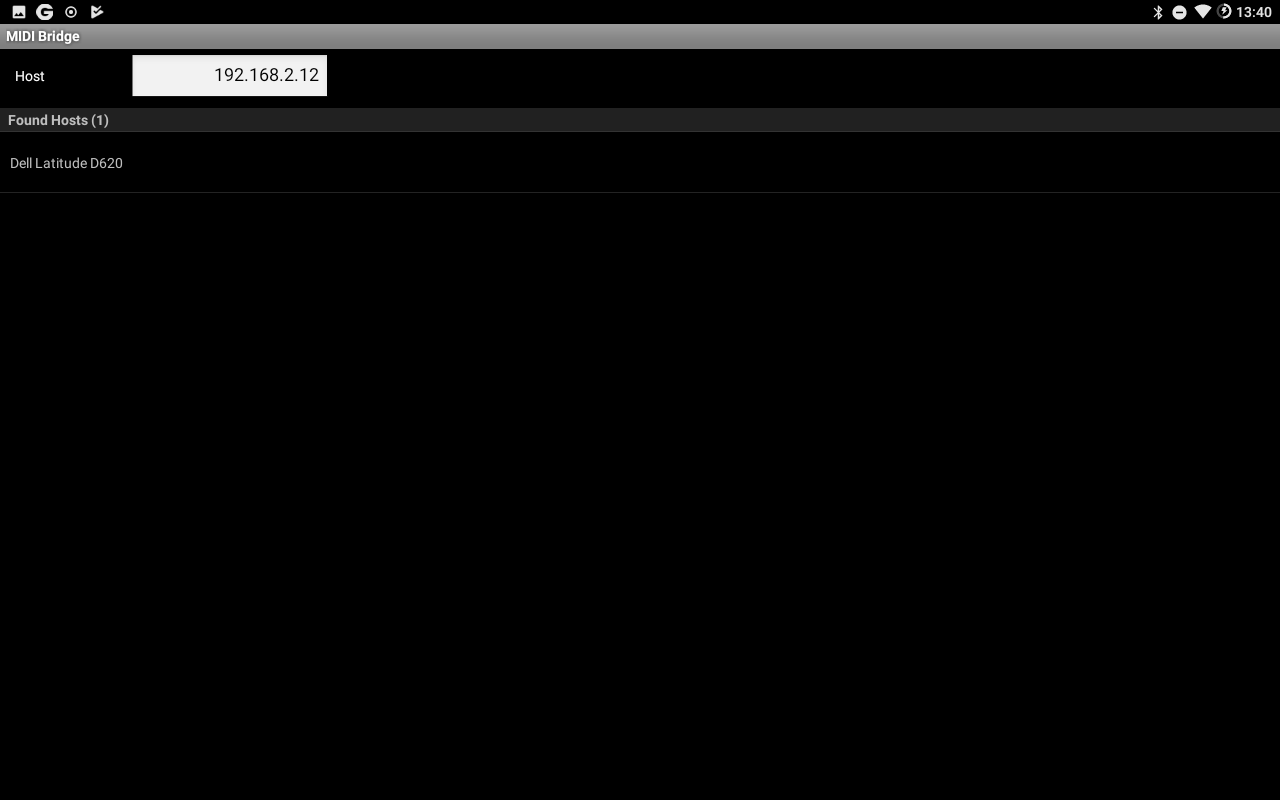
When you tap it you see Host. There you can fill in the IP address of your computer. When you have Bonjour installed you will see your computer. Then it is easy, just tap your computer and IP address will be filled in automatically. If not you will need to fill in your IP address manually. See below screenshot.
Once done you will go back to the Settings page. There you can select Layout. Just select the Keys layout for now as this is only for testing purposes. Once selected tap Done and you will get in the main screen of TouchOSC.
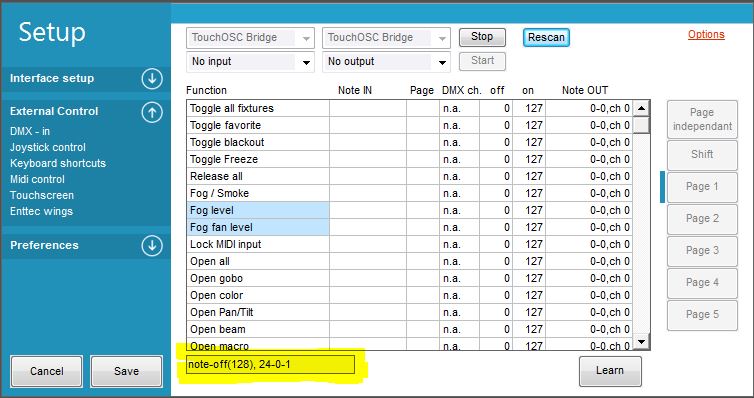
Go back to the FreeStyler Setup and open External Control → MIDI. On the left in the bottom there is a field which is blank. When you touch a key on the keyboard in your mobile device there should show up a value as seen in below screenshot.
Once this works you are now ready to start working on a layout which serves your purpose or see if you can find a good ready-made one in the forum. So we will go on now with creating a layout.
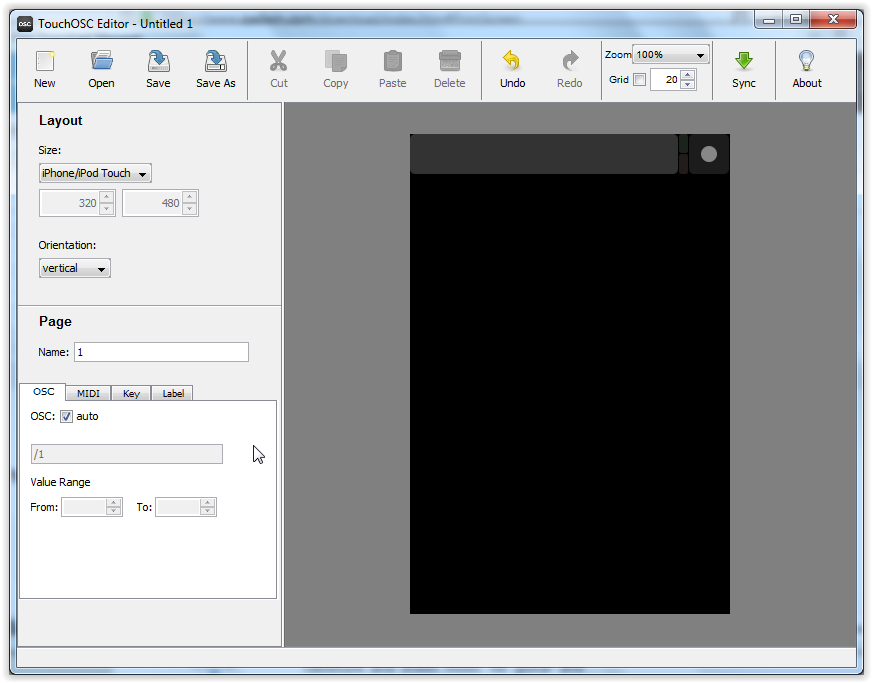
The first thing to do is open the TouchOSC Editor. The main page looks like this:
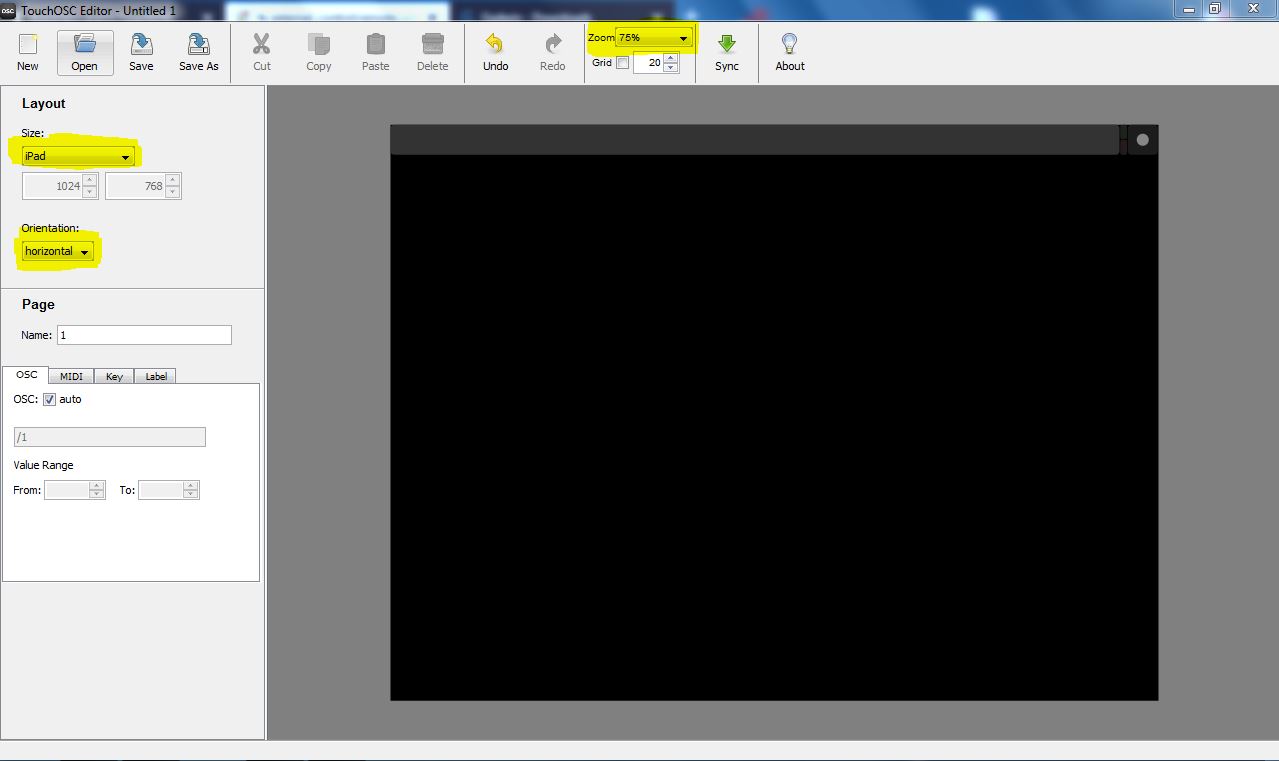
The program will start always with these settings. On the left select the layout you want. In my case I will use the iPad layout as I am using a Samsung Galaxy Tab3. Also I want to use my tablet in landscape so I will set the orientation to horizontal. And because I want to fit my screen in the window I will zoom out the view to 75% so I can see the whole workspace. When done my screen looks like this (highlighted the changed settings):
Now we are ready to create controls. Use the links below to go to the different controls. Just remember that you cannot use the same channel twice with the same value.
Click here to learn how to create Faders.
Click here to learn how to create Buttons.
Click here to learn how to create Multi X/Y control(Very nice control to move moving heads manually).
Happy designing!
Feel free to add to the manual.