FX
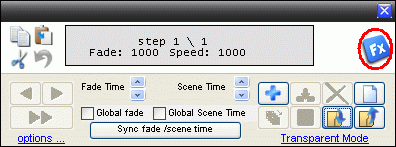
The FX is a part of the sequence editor in the upper right corner, where predefined waveforms or effects can be generated.
The generator will find an optimal number of steps and automatically create a waveform or effect on a predefined channel.
In general the FX generator is used by selecting the wanted fixtures, selecting the wave / effect and then selecting the channels that are to be controlled.
There are also some additional parameters that can be set and then by pressing “Generate” a sequence with xx steps is created.
There is a minimum of two fixtures that has to be selected.
The following 10 wave forms / effects can be added to the 14 channels listed bellow.
Waves/ Effects:
Sine
Cosine
Saw
Chase
Cascade
FlipFlop
Inverse Chase
In & Out
Can Can
Special
Channel.
1. Pan
2. Tilt
3. Gobo
4. Gobo Rotation
5. Color
6. Intensity
7. Shutter on/off
8. Iris
9. Prism
10. Prism Rotation
11. Cyan/Red
12. Magenta/Green
13. Yellow/Blue
14. Strobe
Note:
Some of the effects have pulse and inverse pulse functions.
The easiest way to explain this is to have a look on the two images below.
It is a function that makes the snap turn on the effect and then slowly fade out the effect.

Reverse pulse makes a slow fade on of the effect and then snap and turn it off.

Also some of the effects has the “Per no of fixtures” this means that the given no of fixtures will be on at the same time.

Note / Tips:
You can add more FX to the same sequence.
The next sequence will be added starting from the current step.
This makes it possible to have the generated patterns in parallel or appended.
Example.

Two rows of led-bars are placed with one row in each side of the rig.
Set the generator to sine waveform and red channel control. This will give let’s say 12 steps in the sequence. De-select the fixtures and select the fixtures in the other side of the rig.
Set the step in the Sequence editor to the first step (Step 1)
Add cosine to red channel control.
The sequence is now running with 12 steps where the led bar in one side starts from 0 → full light → 0 and the other side runs from full light → 0 → full.
How will this look in real life?
It will be a red light slowly fading from one from one side of the rig to the other.
Another example could be adding Cascade and Cancan after each other.

Here it is just first to generate Cascade and then let the step in the sequence editor stay on the last step.
Shift to Cancan and then generate the pattern.
The two patterns will now be after each other.
Sine
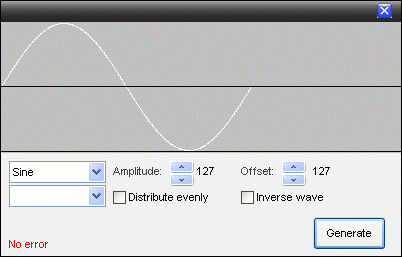
This waveform has the following parameter.
Amplitude: It is here set to 127 which means that the sine wave will go from 127 to -127.
Offset: Here set to 127.
These two parameter gives the wave max and min values.
The value is Amplitude + offset. Max = 127 + 127 and Min = -127 + 127.
Note: These two parameters can be put together and be set so the max value exceeds 0 and 255 which is the range of a DMX channel. The value, will in this case be hard limited to 0 or 255.
This can also be monitored in the FX panel where the changes in the waveform can be seen directly.
Distributed evenly:
Off: All selected fixtures starts from the same point so all will have the same values which will look like they are in parallel.
On: This spread the waveform over the selected fixture so they don't start from the same point.
Inverse wave:
On: This mirrors the waveform.
This can also be monitored in the FX panel where the changes in the waveform can be seen direct.
Channel:
On the figure above no channel has been selected but this also has to be selected.
Cosine
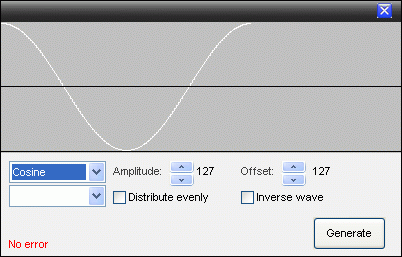
This waveform has the following parameter.
Amplitude: It is here set to 127 which means that the sine wave will go from 127 to -127.
Offset: Here set to 127.
These two parameters give the wave max and min values.
The value is Amplitude + offset. Max = 127 + 127 and Min = -127 + 127.
Note: These two parameters can be together and be set so the max value exceeds 0 and 255 which is the range of a DMX channel. The value will in this case be hard limited to 0 or 255.
This can also be monitored in the FX panel where the changes in the waveform can be seen direct.
Distributed evenly:
Off: All selected fixtures starts from the same point so all will have the same values which will look like they are in parallel.
On: This spread the waveform over the selected fixture so they don’t start from the same point.
Inverse wave:
On: This mirrors the waveform.
This can also be monitored in the FX panel where the changes in the waveform can be seen direct.
Channel:
On the figure above no channel has been selected but this also has to be selected.
Saw
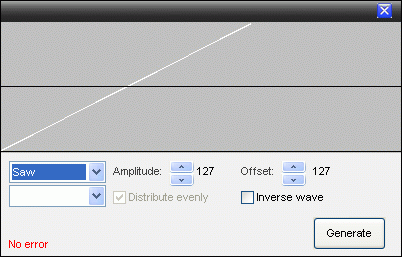
This waveform has the following parameter.
Amplitude: It is here set to 127 which means that the sine wave will go from 127 to -127.
Offset: Here set to 127.
These two parameter gives the wave max and min values.
The value is Amplitude + offset. Max = 127 + 127 and Min = -127 + 127.
Note: These two parameters can together be set so the max value exceed 0 and 255 which is the range of a DMX channel. The value will in this case be hard limited to 0 or 255.
This can also be monitored in the FX panel where the changes in the waveform can be seen direct.
Distributed evenly:
Off: All selected fixtures starts from the same point so all will have the same values which will look like they are in parallel.
On: This spread the waveform over the selected fixture so they don’t start from the same point.
Inverse wave:
On: This mirrors the waveform.
This can also be monitored in the FX panel where the changes in the waveform can be seen direct.
Channel:
On the figure above no channel has been selected but this also has to be selected.
Chase
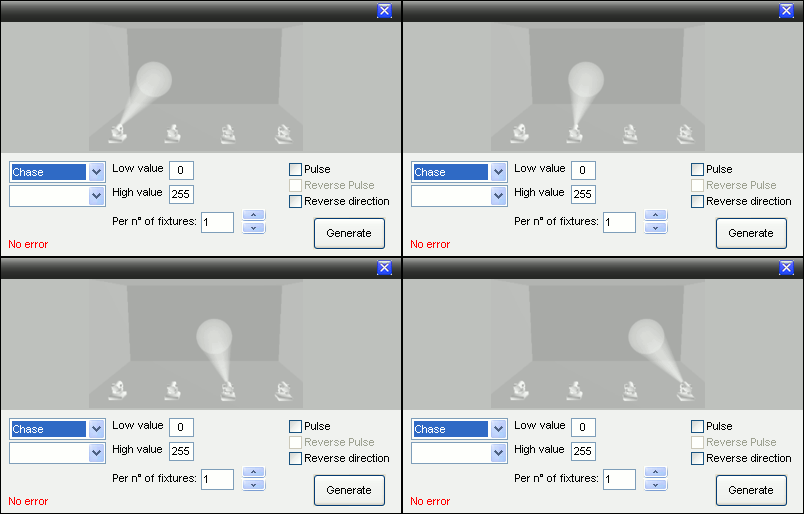
This effect is an on / off function where in “Off” situation Low value is used and in “On” the high value is used.
The on / off pattern can be seen above.
Pulse:
Off: The on / off shift in the pattern is snap which correspond to instant on and off.
On: The on shift in the pattern is snap and the off shift is fading.
Reverse Pulse:
This is greyed out until Pulse is “Checked on”
On: The on shift in the pattern is fading and the off shift is snap.
Reverse direction:
On: Makes the pattern go backwards.
Per no of fixtures:
This value set the number of neighbor fixtures that are on at the same time.
Channel:
On the figure above no channel has been selected but the channel that are to be controlled with this pattern also has to be selected.

Cascade
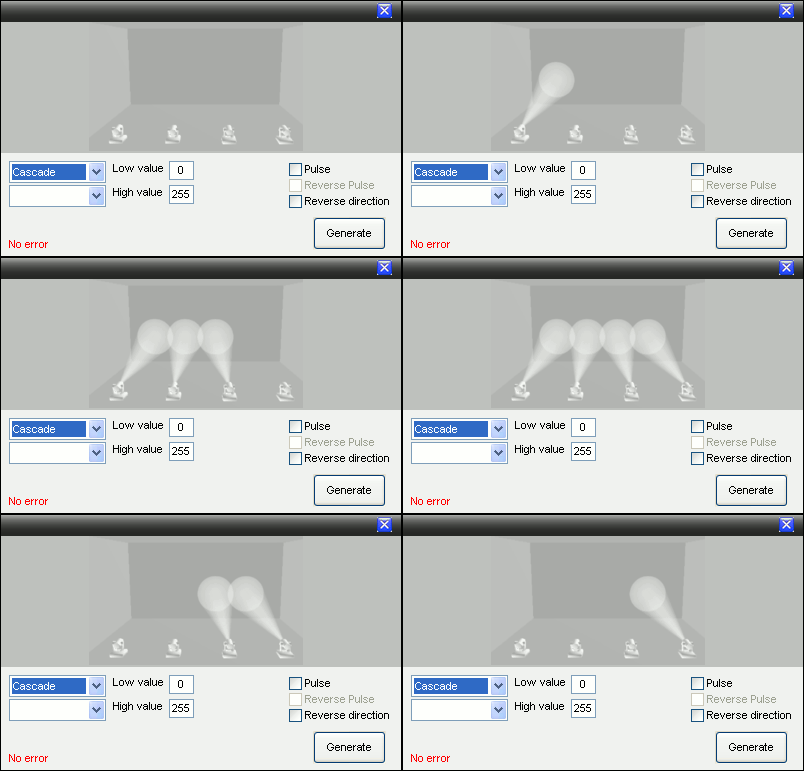
This effect is an on / off function where in “Off” situation Low value is used and in “On” the high value is used.
The on / off pattern can be seen above.
Pulse:
Off: The on / off shift in the pattern is snap which correspond to instant on and off.
On: The on shift in the pattern is snap and the off shift is fading.
Reverse Pulse:
This is greyed out until Pulse is “Checked on”
On: The on shift in the pattern is fading and the off shift is snap.
Reverse direction:
On: Makes the pattern go backwards.
Channel:
On the figure above no channel has been selected but the channels that are to be controlled with this pattern must also be selected.

FlipFlop
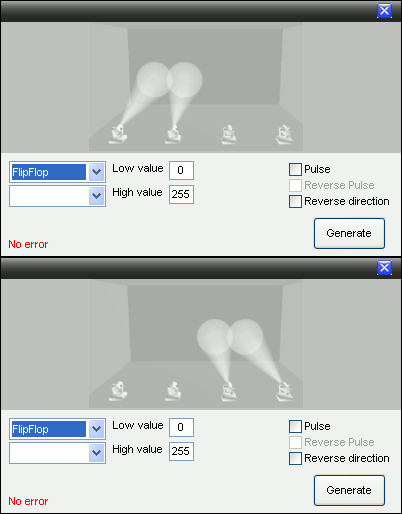
This effect is an on / off function where in “Off” situation Low value is used and in “On” the high value is used.
The on / off pattern can be seen above.
Pulse:
Off: The on / off shift in the pattern is snap which correspond to instant on and off.
On: The on shift in the pattern is snap and the off shift is fading.
Reverse Pulse:
This is greyed out until Pulse is “Checked on”
On: The on shift in the pattern is fading and the off shift is snap.
Reverse direction:
On: Makes the pattern go backwards.
Channel:
On the figure above no channel has been selected but the channels that are to be controlled with this pattern also have to be selected.

Inverse Chase
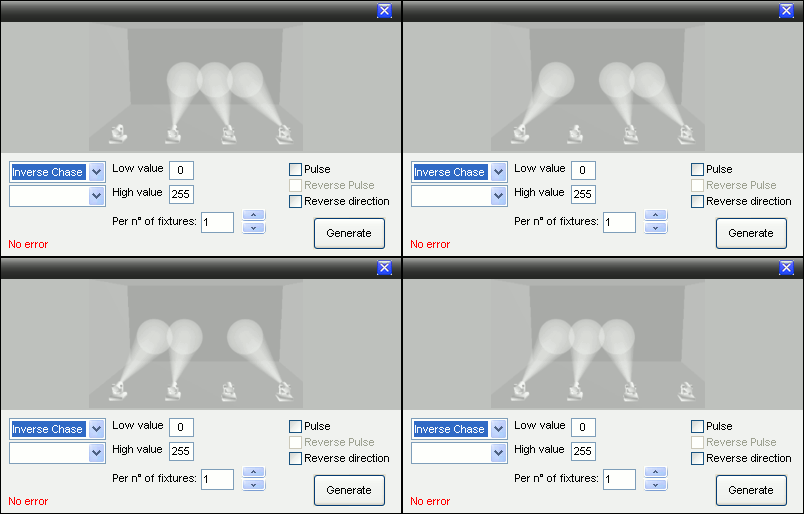
This effect is an on / off function where in “Off” situation the Low value is used and in “On” the high value is used.
The on / off pattern can be seen above.
Pulse:
Off: The on / off shift in the pattern is snap which correspond to an instant on and off.
On: The on shift in the pattern is snap and the off shift is fading.
Reverse Pulse:
This is greyed out until Pulse is “Checked on”
On: The on shift in the pattern is fading and the off shift is snap.
Reverse direction:
On: Makes the pattern go backwards.
Per no of fixtures:
This value set the number of neighbour fixtures that are on at the same time.
Channel:
On the figure above no channel has been selected but the channels that are to be controlled with this pattern also have to be selected.

In Out
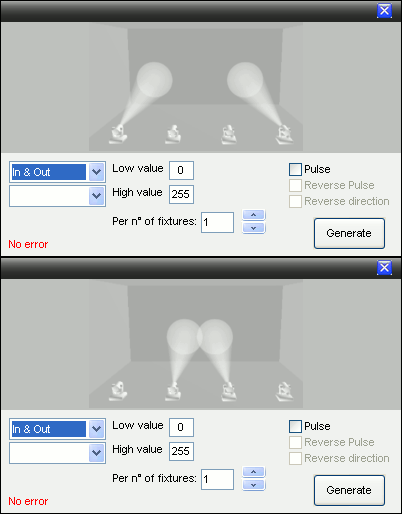
This effect is an on / off function where in “Off” situation the Low value is used and in “On” the high value is used.
The on / off pattern can be seen above.
Pulse:
Off: The on / off shift in the pattern is snap which correspond to instant on and off.
On: The on shift in the pattern is snap and the off shift is fading.
Reverse Pulse:
This is greyed out until Pulse is “Checked on”
On: The on shift in the pattern is fading and the off shift is snap.
Reverse direction:
This function is not actual and is therefore greyed out.
Per no of fixtures:
This value sets the number of neighbour fixtures that are on at the same time.
Channel:
On the figure above no channel has been selected but the channels that are to be controlled with this pattern also have to be selected.
Can Can
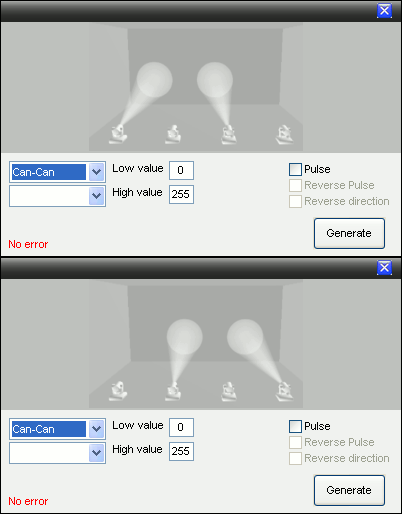
This effect is an on / off function where in “Off” situation Low value is used and in “On” the high value is used.
The on / off pattern can be seen above.
Pulse:
Off: The on / off shift in the pattern is snap which correspond to instant on and off.
On: The on shift in the pattern is snap and the off shift is fading.
Reverse Pulse:
This is greyed out until Pulse is “Checked on”
On: The on shift in the pattern is fading and the off shift is snap.
Reverse direction:
This is not actual in effect and therefore greyed out.
Channel:
On the figure above no channel has been selected but the channels that are to be controlled with this pattern also have to be selected.
Special
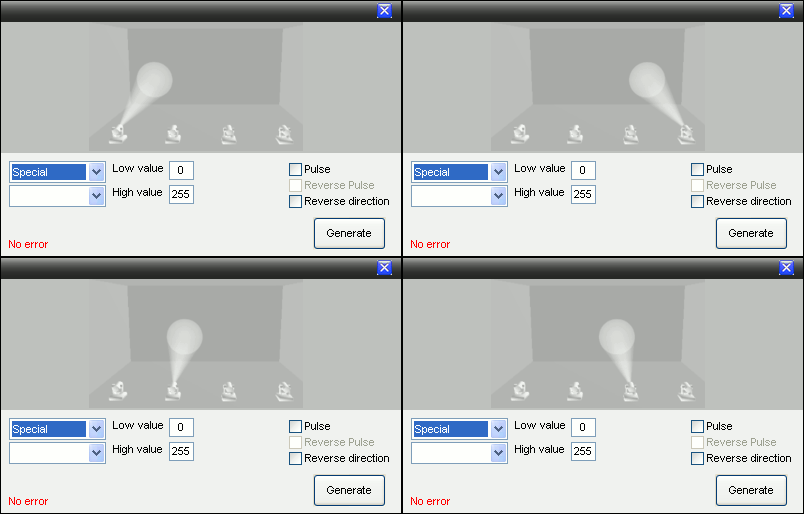
This effect is an on / off function where in “Off” situation Low value is used and in “On” the high value is used.
The on / off pattern can be seen above.
Pulse:
Off: The on / off shift in the pattern is snap which correspond to instant on and off.
On: The on shift in the pattern is snap and the off shift is fading.
Reverse Pulse:
This is greyed out until Pulse is “Checked on”
On: The on shift in the pattern is fading and the off shift is snap.
Reverse direction:
On: Makes the pattern go backwards.
Channel:
On the figure above no channel has been selected but the channels that are to be controlled with this pattern also have to be selected.

