This is an old revision of the document!
LedTrix – Setup Window
Instead of describing the parameters that can be set in the “Setup window” and example has been made.
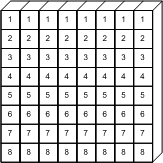
In the example I have used 8 x ”Kam Led 800 Stripline” to create an 8 x 8 matrix.
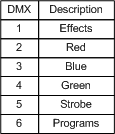
Each Kam has 8 segments that uses 6 DMX channels for control. The 6 channels looks like this bellow.
With LedTrix we only want to control the colors because it is a tool to display graphics meaning that only 2, 3, and 4 are of interest.
A whole Kam stripline uses 6 x 8 = 48 addresses and whole matrix of 8 Kams uses 8 x 48 = 384 addresses.
Note:
I a case where only 3 channels are used to control each segment DNX 512 = 512 addresses can control 170 segments and this gives a matrix of max 13 x 13.
Kam LED 800 Stripline Set to 8 segments
All Kams are placed with DMX addresses next to each other. See the figure.
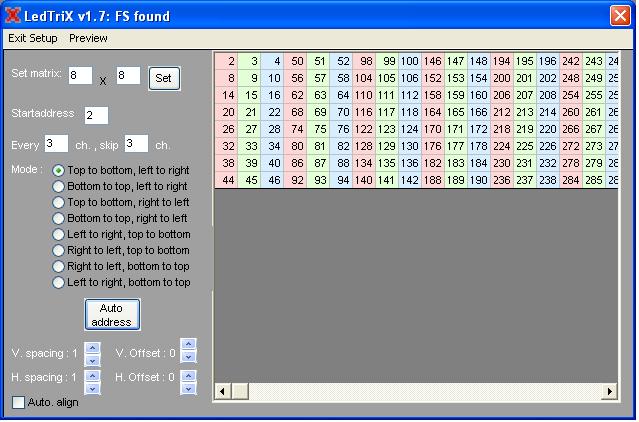
This gives a start address = 2 because it is the first red segment.
And for every 3 addresses we are to skip 3 to get the next red segment.
Bellow these values can bee seen.
As the first segment in the matrix is upper left corner the mode “Mode” entry is set to this.
Remember to press the “Auto address” button”
Looking on the color / address window the addresses can be checked.
First Kam, segment 1 has adr. 2, 3, 4 and segment 2 has adr. 8, 9 and 10.
This correspond to the drawing above.
Image Control
The image is normally larger than the matrix that are used display it. There are some parameters that can be used to move the matrix.
Here is a gif that can be used to show the effect of these parameters.
It has been made with a freeware program “GIMP 2” www.gimp.org
“V. Offset and H. Offset”
This is a manual way to move the matrix Vertical and Horizontal around in the image.
Here are two plots with the offset set to 0 and 3
“Auto. align”
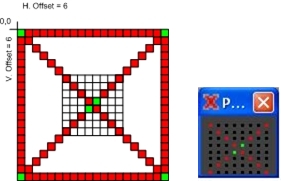
If you set on the Auto. align then when you select an image it will automatically be centered to the matrix.
In this case with a image of size 20 x 20 it will automatically set the both offsets to 6.
This can be seen if you exit the setup window, select the image and then return to the setup window.
The offsets have now the values 6
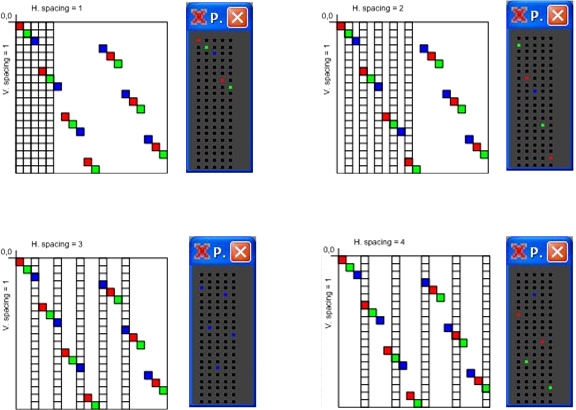
“V. spacing and H. Spacing”
To demonstrate the spacing function a matrix of 20 x 5 is used.
Spacing is if you only want to mount a reduced no of fixtures.
If this parameters is used then the fixture buildup are to be symmetrical.
The spacing don’t start at the first colon / row but the colon / row with then spacing no.
Also when the spacing is to high so the matrix is larger than the image then the preview don’t perform as expected.
Here spacing 1,2,3 and 4 are shown.
Matrix larger than image.
Here spacing are 5 and 6 and as it can bee seen the function is not well definde here so this setting are to be avoied.
At spacing 5 a black colon appears as expexted but spacing 6 gives an image without spacing.

